Crafting Delight: A Guide to Creating the Perfect Easter Loopy Bow
Share
Introduction:
As Easter approaches, it's time to add a touch of creativity and charm to your celebrations. One delightful way to do this is by crafting a beautiful Easter Loopy Bow. Whether you're decorating Easter baskets, gift packages, or even using them as festive home decor, these bows are sure to add a whimsical and festive touch to your surroundings. In this guide, we'll take you through the step-by-step process of creating the perfect Easter Loopy Bow that will leave everyone in awe of your crafting skills.
Materials Needed:
-
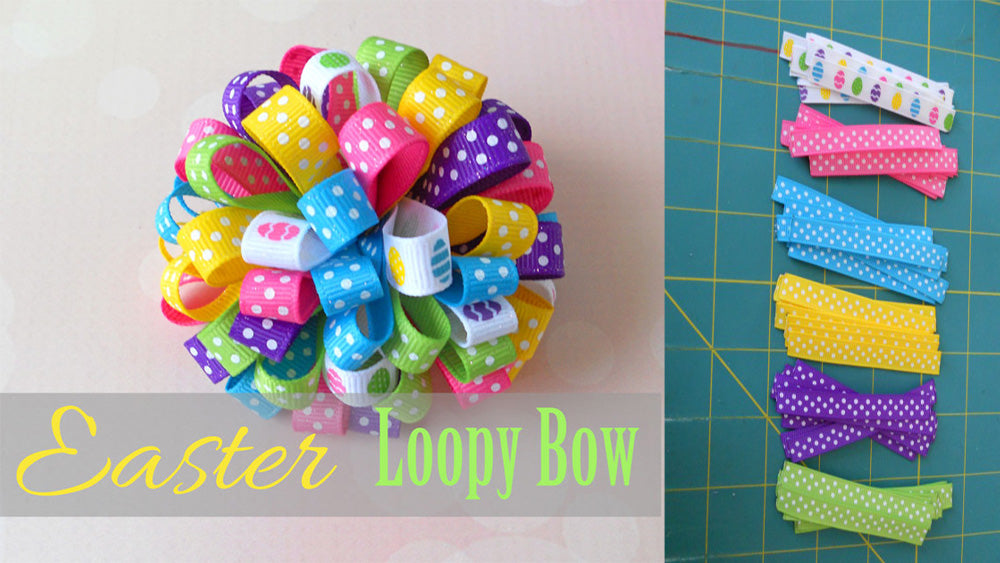
Colorful Ribbon: Choose an assortment of pastel-colored ribbons to capture the essence of Easter. Opt for patterns like polka dots, stripes, or even bunny prints for an extra festive touch.
-
Scissors: A sharp pair of scissors will be essential for cutting the ribbons to the desired length and shape.
-
Wire: Use thin craft wire to secure the loops of the bow and ensure it holds its shape.
-
Glue Gun and Glue Sticks: A hot glue gun will be handy for securing the layers of the bow and adding any additional embellishments.
-
Easter-themed Embellishments (optional): Consider adding small Easter-themed decorations like mini eggs, chicks, or bunny figurines for an extra festive flair.
Step-by-Step Guide:
-
Prepare Your Workspace: Before you begin crafting your Easter Loopy Bow, make sure you have a clean and organized workspace. Lay out all your materials and tools for easy access.
-
Cut the Ribbons: Measure and cut the ribbons into varying lengths, depending on the size of the bow you want. You can experiment with different lengths to create a dynamic and visually appealing bow.
-
Create Loops: Take a ribbon and form a loop, securing the ends with a small piece of wire. Repeat this process with different ribbons, creating a variety of loop sizes.
-
Layer the Loops: Begin layering the loops on top of each other, arranging them in a pleasing manner. Use the hot glue gun to secure the loops together, creating a stacked effect.
-
Shape the Bow: Once all the loops are attached, fluff and shape the bow to your liking. Adjust the loop sizes and positions to achieve a balanced and full appearance.
-
Secure the Bow: Cut a small piece of ribbon and wrap it around the center of the bow, covering the wire and securing the loops in place. Tie a knot or use hot glue to secure the ribbon in place.
-
Add Embellishments (Optional): If desired, enhance your Easter Loopy Bow by attaching Easter-themed embellishments using hot glue. This could include mini eggs, chicks, or small bunny figurines.
Conclusion:
Congratulations! You've successfully crafted a stunning Easter Loopy Bow that will undoubtedly add a festive and charming touch to your Easter celebrations. Whether you use it to adorn gifts, baskets, or as part of your home decor, your handmade bow is sure to be a standout feature during this joyous season. Get creative, experiment with different ribbon colors and patterns, and most importantly, have fun with your Easter crafting!


