
How to Make a Mini Bow with Ribbon & Fork
Those lopsided, fraying bows you’ve been tying? They’re quietly stealing the charm from your DIY gifts and crafts. You’ve followed the tutorials, tried to eyeball the loops, and still—something feels off. You don’t want good-enough anymore; you want polished, pretty, and professional without wasting ribbon or patience.
What if the fix has been sitting in your kitchen drawer all along—and it’s the one thing that finally makes every bow perfect?
A Brief History of Ribbons
Ribbons didn’t begin as decorative bows—they started as symbols of status and wealth. Originally worn by nobility and the upper class, ribbons became a sign of luxury long before they found their place in everyday use.
By the 17th and 18th centuries, they were a key part of fashion, often used to embellish both men's and women’s clothing. But ribbons didn’t stop at style—they’ve since woven their way into many aspects of modern life.
Today, ribbons are everywhere—from awareness campaigns to festive décor—making them a familiar and meaningful item in homes around the world.
5 Steps to Make a Mini Bow with a Fork
Creating a mini bow doesn’t have to be complicated or time-consuming. With just a ribbon, a fork, and a few minutes, you can make a perfect little bow for any craft or gift.
Materials You'll Need:
- Ribbon: Choose any type or color based on your project. Satin, grosgrain, or organza ribbons all work great.
- Scissors: For trimming the ends of the ribbon.
- Fork: A standard dinner fork works well, but you can use different sizes depending on how big or small you want the bow.

Step 1 – Measure and Wrap
Cut a strip of ribbon approximately 30 cm long. Then take the ribbon and wrap it horizontally around the middle of the fork, keeping both ends even. The fork will act as a template and guide for shaping your bow.
Step 2 – Create the Center Loop
Take the lower end of the ribbon and fold it over the front of the fork, then thread it down through the center space between the prongs. Pull the ends to tighten it slightly so it holds in place.

Step 3 – Secure the Loop
Take the same ribbon end you just threaded through and bring it up from behind the fork. Thread it down again through the same center space—this time coming over the top. It should cross over the other ribbon end on the front side of the fork. Pull both ends to form a tight, neat knot.
Step 4 – Tie and Slide Off
Once the knot is secure, pull both ribbon ends firmly to tighten. Slide the entire bow off the fork gently, keeping the knot in place. You’ll now see the shape of your mini bow coming together.
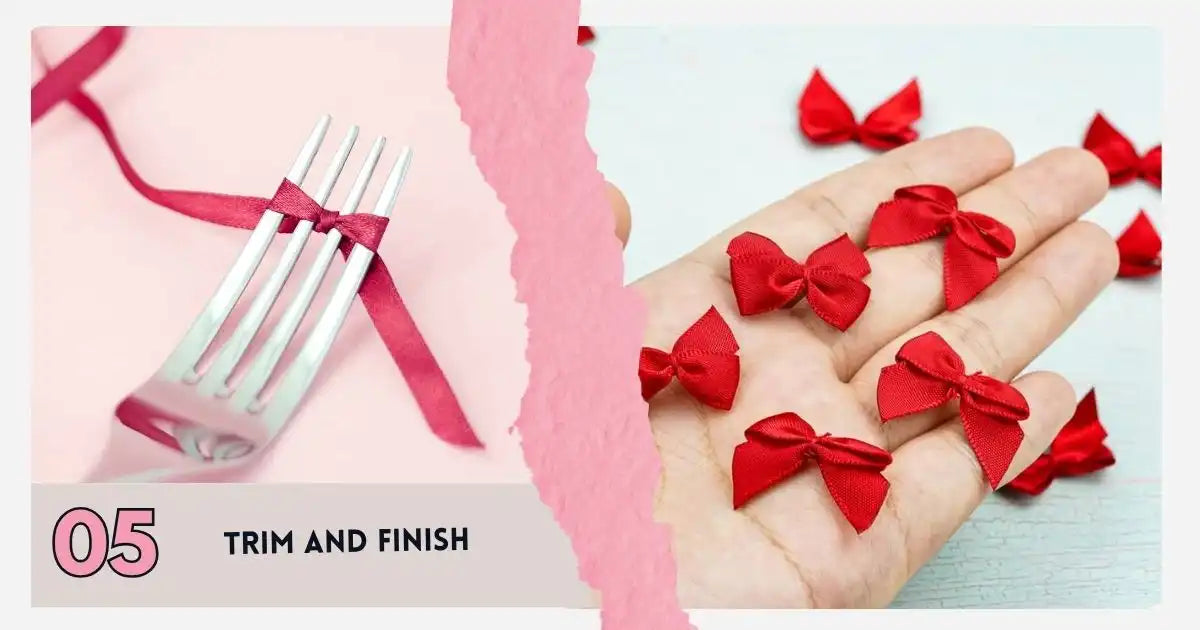
Step 5 – Trim and Finish
Use scissors to trim the ribbon tails to your desired length. You can cut them at an angle or into a V-shape for a polished finish. Fluff the loops if needed, and your bow is ready to use!
Where to Use Your Mini Bows

Once you’ve made one, you’ll want to make more! These mini bows can be used in so many ways:
- Decorating gift boxes or envelopes
- Adding to handmade cards or scrapbooks
- Gluing onto bobby pins or hair clips
- Embellishing mason jars, candles, or party favors
- Creating tiny accents for wreaths or garlands
Tie It Right, Make It Count
Small details speak the loudest—and nothing says "you cared" like a perfect, tiny red bow. Now that you’ve learned how to make a small bow on a fork, don’t just stop at one. Keep tying bows with a fork until it becomes second nature. These little touches turn simple crafts into keepsakes.
Using BBcrafts ribbon makes the job easier, cleaner, and prettier. Their smooth finish helps every loop hold its shape, and you’ll waste less—more bows, less fuss. If you're making bows with a fork for hair clips or adding small red ribbon bows to party favors, the difference shows.
You’ve got the trick, the tools, and the know-how. So why settle for store-bought shortcuts? Go hands-on. Think outside the box—and top it with a bow.
Isn’t it time your crafts looked as good as the love you put into them?
Key Takeaways
A Fork Is Your Secret Craft Weapon
Forget complicated tools. Learning how to make a small bow on a fork turns an everyday kitchen item into a precision bow maker. It’s simple, fast, and great for tying bows with a fork that actually look polished.
Small Bows, Big Impact
Tiny red bows for crafts might seem like a small touch, but they instantly level up gift wrapping, party favors, and handmade décor. With the bow fork method, each bow is perfectly shaped and professional-looking—no guesswork, no frayed mess.
BBcrafts Ribbon Makes Every Loop Count
Pair your making bows with a fork skills with BBcrafts ribbon for smoother tying, cleaner cuts, and long-lasting shape. From small red ribbon bows to custom creations, the quality shows—and so does the love behind your work.


